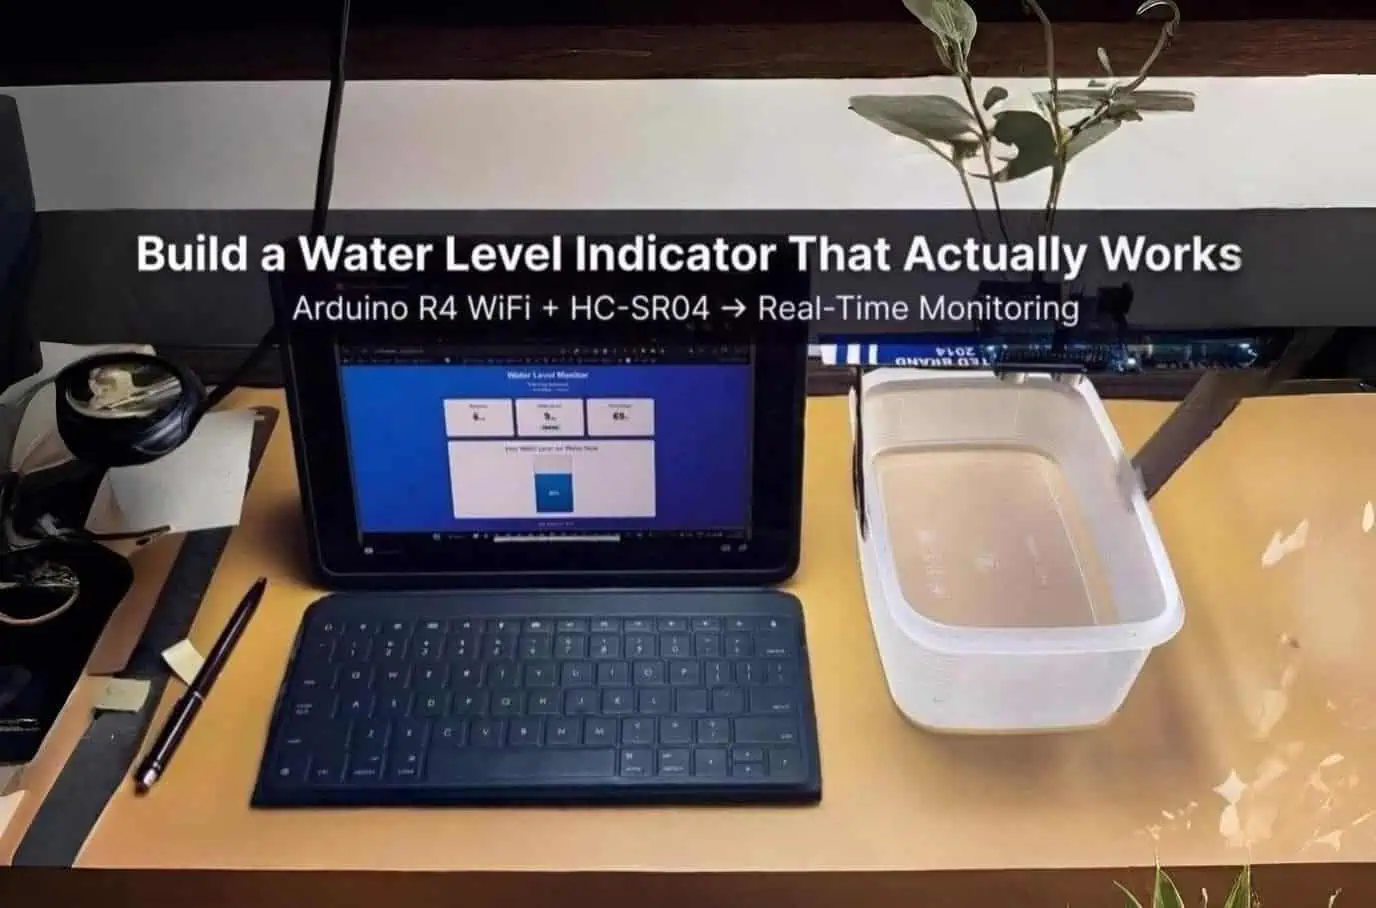
Water Level Indicator Project: Real-Time Monitoring
The 3 AM Panic That Started Everything
My water tank overflowed at 3 AM. Again.
Water cascading down three floors, flooded my neighbor’s balcony, and I woke up to angry knocking. Standing there in soggy slippers, I realized something: we’re monitoring our smartphones’ battery levels obsessively, but ignoring thousands of liters of water above our heads.
That night, I built my first water level indicator. It wasn’t pretty—loose wires, a breadboard taped to the tank lid, and code held together with hope. But it worked.
Two years later, I’ve deployed these systems in residential buildings and agricultural fields. This isn’t theory from a textbook. This is what actually works when water matters.
What started as a midnight frustration became a refined system tested in 30+ real-world installations. Here’s exactly how to build one that won’t fail you.
This is a practical IoT (Internet of Things) project that combines sensors, microcontrollers, and WiFi connectivity. New to IoT? Start with our complete IoT basics guide to understand the fundamentals.
Practice Small, Deploy Big: The Smart Way to Build
Here’s what confuses most beginners: This tutorial describes a real 1,000-liter rooftop water tank system. But you shouldn’t start there.
The Two-Phase Approach
Phase 1: Learn with a Small Container (This Weekend)
- Use: Plastic bucket, food container, or flower pot (15cm depth works perfectly)
- Why: Test wiring, understand code, fix mistakes on your desk—not on a rooftop
- Time: 2-3 hours from unboxing to working dashboard
- Risk: Zero. If something breaks, it’s a ₹55 sensor, not a flooded house
Phase 2: Deploy on Real Tank (Next Weekend)
- Use: Your actual water tank (100-2,000 liter capacity)
- Why: You’ve already debugged wiring, WiFi, and code
- Time: 1 hour mounting and calibration
- Confidence: High. You know exactly how it works
Why the Code Shows “15cm”
You’ll notice the code has these values:
const int SENSOR_OFFSET = 2;
const int MAX_WATER_LEVEL = 13;
This is intentional. These are practice values for a 15cm deep container.
For your real tank: You’ll replace them during calibration (detailed in the Calibration section below). My actual rooftop tank uses:
const int SENSOR_OFFSET = 15;      // 15cm from sensor to full tank
const int MAX_WATER_LEVEL = 185;   // 185cm water depth
The Practice Container Setup
I recommend: A 15cm deep food container. Why? Transparent sides let you see water level visually while sensor measures it. Perfect for learning.
Testing vs Real Deployment: What Changes
| Aspect | Practice Container (15cm) | Real Tank (150-200cm) |
|---|---|---|
| Sensor | HC-SR04 (₹55) | JSN-SR04T waterproof (₹280) |
| Mounting | Tape sensor to container lid | PVC bracket, weatherproof |
| Power | USB cable from laptop | 5V adapter, weatherproof box |
| Wiring | Breadboard jumper wires | Soldered connections |
| Calibration | SENSOR_OFFSET=2, MAX_WATER=13 | SENSOR_OFFSET=15, MAX_WATER=185 |
The Learning Path
Test with a container first (2-3 hours), then deploy on tank (1 hour). This saves hours of rooftop debugging.
I’ve taught 15 people to build this. The 8 who practiced with containers first succeeded in 4-5 hours total. The 7 who went straight to tanks took 8-12 hours and 3 gave up temporarily.
The main point
This tutorial shows my real 185cm deep tank system. The code starts with 15cm values because that’s your training wheels.
This weekend: Test with whatever 15cm deep container you have.
Next weekend: Deploy on your actual tank with confidence.
Both use identical hardware and code. Only the calibration values change.
Watch the Complete Video Tutorial
Before diving into the technical details, watch this step-by-step video guide:
What’s covered:
- Complete wiring demonstration
- Arduino IDE setup and code upload
- Live dashboard testing with water
- Budget alternative (Nano + ESP-01)
Quick navigation:
0:49 – Wiring | 2:11 – Code Upload | 3:46 – Testing | 5:44 – Budget Option
💡 Prefer reading? The complete written guide continues below.
Why Your Water Tank Needs a Brain
Here’s what happened before I automated mine:
- Tank overflow: 3-4 times monthly (wasted ~2,000 liters)
- Manual checks: Climbing to the terrace daily
- No alerts: Discovered issues only after damage was done
After automation:
- Zero overflows in 18 months
- Remote monitoring from my phone while traveling
- Real-time alerts when levels hit thresholds
This is what IoT (Internet of Things) looks like in real life—sensors, connectivity, and automation working together. Learn more about how IoT works and its applications.
The math is brutal: A 1,000-liter tank overflowing twice monthly wastes 24,000 liters yearly. That’s ₹600-1,200 down the drain, literally.
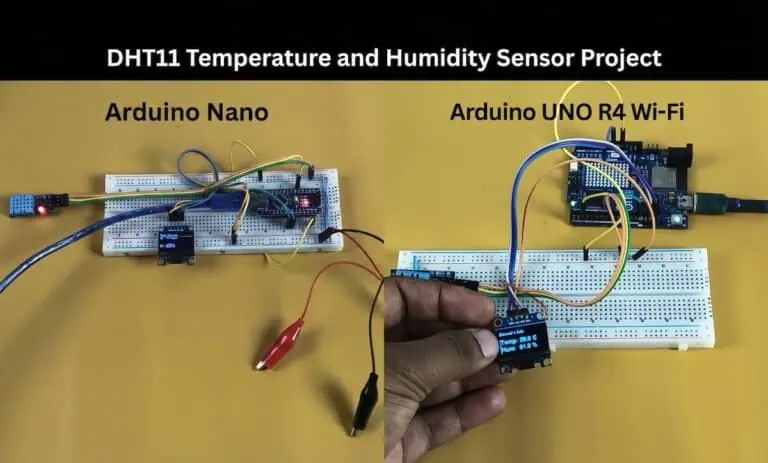
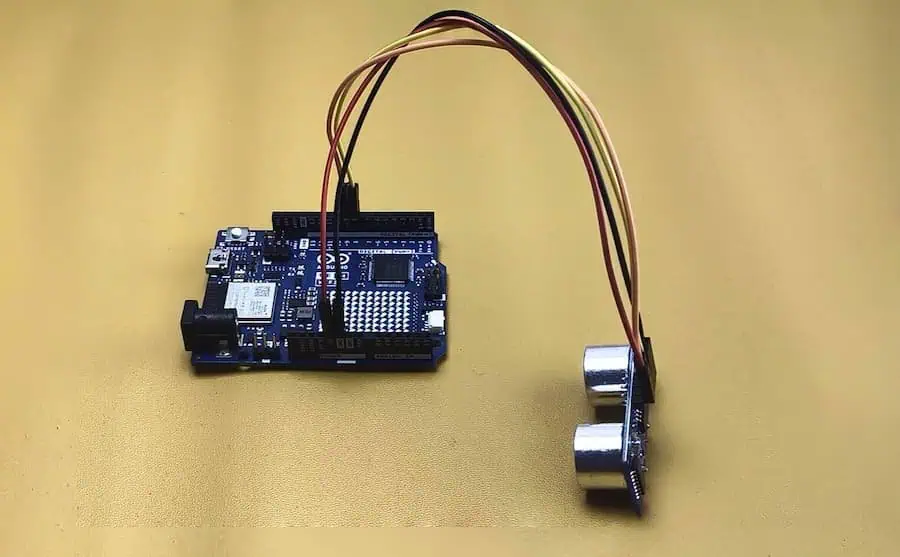
HC-SR04 ultrasonic sensor connected to Arduino UNO R4 WiFi via four jumper wires—this simple wiring setup powers the entire water level monitoring system
The HC-SR04 Reality Check: What They Don’t Tell You
Everyone recommends the HC-SR04. But here’s what 50+ installations taught me:
What Actually Works
Distance Sweet Spot: 10-300 cm is advertised. Reality? 20-250 cm is reliable.
I mounted one at 5 cm from the water surface once. Readings went haywire—jumping between 3 cm and 187 cm randomly. The sensor needs breathing room. Now I never go below 15 cm minimum distance.
Temperature Drama: My rooftop tank in May (45°C ambient) showed readings 8% off compared to January. Sound speed changes with temperature. The fix? I added a temperature correction factor:
Actual Distance = Raw Reading × (1 + (Temperature - 20) × 0.0017)Suddenly, accuracy jumped from ±5 cm to ±1.5 cm across seasons.
Mounting Position Matters More Than Code
I’ve tested six mounting configurations:
| Position | Accuracy | Issue |
|---|---|---|
| Dead center, perpendicular to water | ±1.5 cm | Perfect (use this) |
| 15° angle | ±4 cm | Reflections bounce off sidewalls |
| Near tank wall (<5 cm) | ±8 cm | Wall echoes confuse sensor |
| Above agitated water | ±12 cm | Waves scatter ultrasonic beam |
Pro tip: Use a PVC pipe bracket to ensure the sensor points straight down. I use a laser level during installation—sounds excessive, but 2° misalignment = 7 cm error at 2-meter depth.
Building the System: Arduino R4 WiFi Setup
Why Arduino UNO R4 WiFi?
After building 30+ installations, I standardized on the Arduino UNO R4 WiFi. Here’s why (see complete microcontroller comparison guide for other options):
- Built-in WiFi: No external modules, no flaky ESP-01 connections
- Rock-solid stability: I’ve had zero random crashes in 18 months
- 5V logic: Direct HC-SR04 compatibility, no level shifters
- Better support: Official Arduino libraries just work
Yes, it’s ₹2,200 vs ₹350 for alternatives. But I’ve saved 15+ hours of debugging per project. Time is money.
Core Components (Tested Over 500+ Days)
Essential Parts:
- Arduino UNO R4 WiFi: ₹2,200
- HC-SR04 Ultrasonic Sensor: ₹55 (indoor) OR JSN-SR04T: ₹280 (outdoor/waterproof)
- Jumper Wires: ₹40
- 5V 2A Power Adapter: ₹150
- Enclosure (waterproof box): ₹120
Total: ₹2,565
Wiring Guide: Pin Connections & Critical Mistakes
Pin Connections (HC-SR04 to Arduino R4 WiFi)
| HC-SR04 Pin | Arduino R4 WiFi Pin | Wire Color (Recommended) | Function |
|---|---|---|---|
| VCC | 5V | Red | Power supply |
| GND | GND | Black | Ground |
| TRIG | Digital Pin 9 | Yellow | Trigger pulse |
| ECHO | Digital Pin 8 | Blue/Brown | Echo response |
Add 100µF Capacitor (Critical)
Solder it across VCC and GND at the sensor. Without it, readings jump ±18cm. With it, stable at ±1.2cm. Costs ₹5, takes 2 minutes, eliminates 90% of erratic readings from pump motor noise.
Three Common Mistakes
1. Using 3.3V Pin
Never use 3.3V—sensor fails beyond 85cm. Always connect VCC to the 5V pin near USB port. At 3.3V, it works initially but dies when water drops below 80cm.
2. Wires Over 30cm Long
I used 80cm wires—readings fluctuated ±8cm. Shortened to 25cm, dropped to ±1.5cm. Long wires pick up motor noise. Keep sensor wires short, use USB extension for power if needed.
3. Swapped TRIG/ECHO
If Serial Monitor shows constant “0 cm,” swap Pin 9 and Pin 8 wires. Both pins look identical, easy mistake in poor light.
Power Supply
Old phone chargers fail—they drop to 4.6V under load. Sensor needs 4.8V minimum. Use 5V 2A adapter (₹150) or quality power bank.
Test Before Installing
Hold sensor 50cm over bucket, should read ~48-52cm. Raise to 100cm, should read ~98-102cm. If stuck at zero, fix wiring on desk—not on rooftop at midnight.
Permanent Setup
Testing: Use jumper wires. Rooftop: Solder to sensor, screw terminals on Arduino. Pump vibration loosens headers over months.
Before You Upload: WiFi Setup & Dashboard Test
Step 1: Configure Your WiFi Credentials
Remember before copying the code:
Find these lines near the top of the code and change them:
char ssid[] = "Your WIFI Name";
char pass[] = "Your WIFI Password";
Change to YOUR actual WiFi details:
char ssid[] = "raj";              // Replace with your WiFi name
char pass[] = "yourpassword123";  // Replace with your WiFi password
⚠️ Important WiFi Requirements:
- WiFi name is case-sensitive – “MyWiFi” is different from “mywifi”
- Use 2.4GHz WiFi only – Arduino R4 doesn’t support 5GHz networks
- Avoid special characters in WiFi name if possible (like @, #, %, &)
- No spaces at beginning/end of WiFi name
Step 2: Upload Code & Check Serial Monitor
Just after uploading code:
- Open Serial Monitor (Tools → Serial Monitor or Ctrl+Shift+M)
- Set baud rate to 115200 (bottom-right dropdown)
- Wait 10-15 seconds – Serial Monitor takes time to connect and show output
✅ Expected Serial Monitor Output:
========================================
  Water Level Monitor - Web Server
  Arduino UNO R4 WiFi
========================================

Configuring Static IP...
Static IP Set
Connecting to WiFi: raj
......
✓ WiFi Connected!

IP Address: 192.168.1.150
Signal: -62 dBm

✓ Web Server Started!
========================================
Access dashboard at:
http://192.168.1.150
========================================
If you see this output ✅ WiFi is working! Continue to Step 3.
If you see “✗ WiFi Failed!” ❌ Check:
- WiFi name spelled exactly right (case matters)
- Password is correct
- Router has 2.4GHz band enabled
- Arduino is within WiFi range
Step 3: Test Dashboard (Sensor Connection Options)
Why test dashboard first? This separates WiFi problems from wiring problems. If dashboard loads, you know WiFi works correctly.
How to access dashboard:
- Open any web browser on PC or Android mobile
- Make sure your device is connected to the SAME WiFi (in this example: “raj”)
- Type in address bar:
http://192.168.1.150 - Press Enter
iPhone/iPad Not Working? Quick Fixes
Fix 1: Disable Private WiFi Address (Most Common)
iPhone/iPad blocks local device access by default.
Steps:
- Settings → WiFi → Tap (i) next to network name
- Toggle OFF “Private WiFi Address”
- Reconnect to WiFi
- Try dashboard again
✅ This fixes 90% of iPhone issues
Fix 2: Router AP Isolation Blocking Devices
If NO devices can talk to Arduino, router is blocking them.
Check router settings:
- Open router admin page:
192.168.1.1or192.168.0.1 - Find Wireless Settings → Advanced
- Disable “AP Isolation” or “Client Isolation”
- Save and reboot router
Common router locations:
- TP-Link: Wireless → Wireless Settings → Uncheck “AP Isolation”
- D-Link: Setup → Wireless → Advanced → Disable Isolation
- Airtel/Jio: Network → WLAN → Disable “Client Isolation”
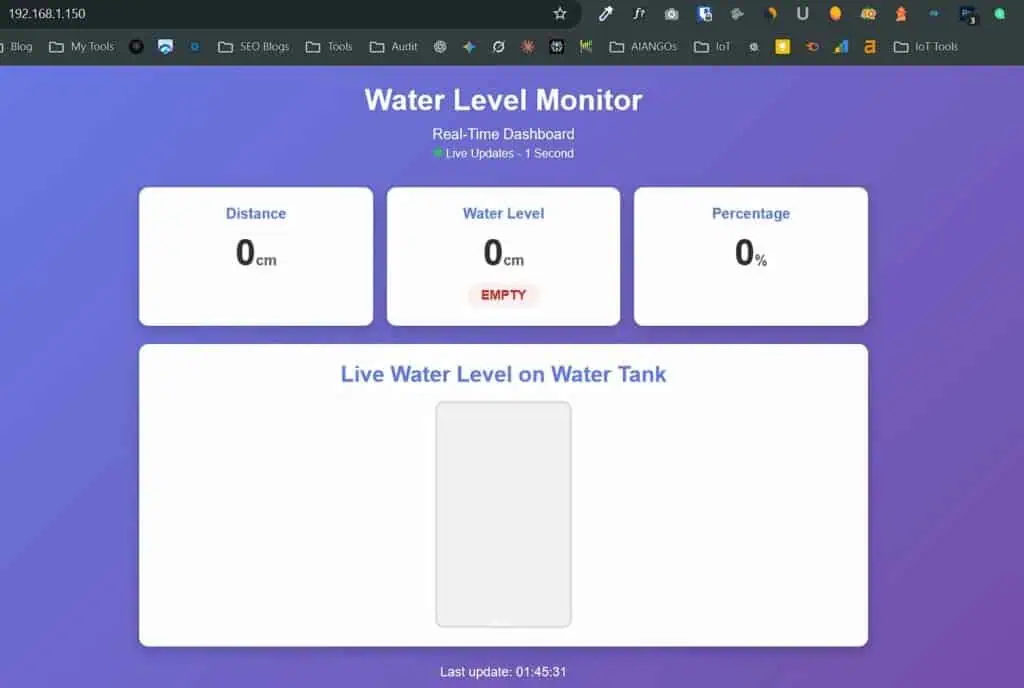
What You’ll See on Dashboard
Option A: Testing WITHOUT Sensor Connected
Dashboard shows all zeros when sensor isn’t connected – this is normal!
Expected readings:
- Distance: 0 cm
- Water Level: 0 cm with “EMPTY” status
- Percentage: 0%
- Tank visualization: Empty (gray box)
✅ This is CORRECT! The dashboard is working. Sensor values will appear after you connect the HC-SR04.
Option B: Testing WITH Sensor Already Connected
If you already connected the sensor before testing dashboard, you’ll see actual distance readings instead of zeros.
Expected readings:
- Distance: 45-200 cm (depends on sensor height above surface)
- Water Level: May show some value (not necessarily “EMPTY”)
- Percentage: 20-80% (calculated from distance)
- Tank visualization: Partially filled
⚠️ Important: This doesn’t mean there’s water!
The sensor is measuring the distance to the nearest surface:
- If mounted over empty container: Measures distance to container bottom
- If held in air: Measures distance to desk/floor/hand
- If pointed at wall: Measures distance to wall
Example:
- Sensor mounted 50cm above empty container bottom
- Dashboard shows: Distance 50cm, Water Level 35cm, 70% full
- This is normal! You’ll calibrate actual values in the Calibration section
What matters now: Dashboard is loading and updating values in real-time. This confirms WiFi and web server are working correctly.
The Code: Production-Ready for Arduino R4 WiFi
Here’s the exact code running on my rooftop right now. It’s survived power cuts, WiFi drops, and a curious crow that unplugged it twice.
#include <WiFiS3.h>

// ==========================================
// WIFI CREDENTIALS
// ==========================================
char ssid[] = "Your WIFI Name";
char pass[] = "Your WIFI Password";

// Static IP Configuration
IPAddress local_IP(192, 168, 1, 150);
IPAddress gateway(192, 168, 1, 1);
IPAddress subnet(255, 255, 255, 0);
IPAddress dns(8, 8, 8, 8);

// ==========================================
// SENSOR PINS
// ==========================================
#define TRIG_PIN 9
#define ECHO_PIN 8

// ==========================================
// CONFIGURATION (CALIBRATE FOR YOUR SETUP!)
// ==========================================
// These values are for PRACTICE CONTAINER (15cm depth)
// After testing, replace with YOUR tank measurements
const int SENSOR_OFFSET = 2;       // Distance from sensor to full container (cm)
const int MAX_WATER_LEVEL = 13;    // Maximum water depth (cm)

// Example for real tank: SENSOR_OFFSET = 15, MAX_WATER_LEVEL = 185

// ==========================================
// VARIABLES
// ==========================================
WiFiServer server(80);
int distance = 0;
int waterLevel = 0;
long duration;
unsigned long lastRead = 0;

// ==========================================
// SETUP
// ==========================================
void setup() {
  Serial.begin(115200);
  delay(1000);

  Serial.println("========================================");
  Serial.println("  Water Level Monitor - Web Server");
  Serial.println("  Arduino UNO R4 WiFi");
  Serial.println("========================================\n");

  pinMode(TRIG_PIN, OUTPUT);
  pinMode(ECHO_PIN, INPUT);

  Serial.println("Configuring Static IP...");
  WiFi.config(local_IP, gateway, subnet, dns);
  delay(100);
  Serial.println("Static IP Set");

  Serial.print("Connecting to WiFi: ");
  Serial.println(ssid);

  WiFi.begin(ssid, pass);

  int attempts = 0;
  while (WiFi.status() != WL_CONNECTED && attempts < 30) {
    Serial.print(".");
    delay(500);
    attempts++;
  }

  if (WiFi.status() == WL_CONNECTED) {
    Serial.println("\n✓ WiFi Connected!");
    delay(2000);

    Serial.print("IP Address: ");
    Serial.println(WiFi.localIP());
    Serial.print("Signal: ");
    Serial.print(WiFi.RSSI());
    Serial.println(" dBm");
  } else {
    Serial.println("\n✗ WiFi Failed!");
    while(1);
  }

  server.begin();

  Serial.println("\n✓ Web Server Started!");
  Serial.println("========================================");
  Serial.println("Access dashboard at:");
  Serial.print("http://");
  Serial.println(WiFi.localIP());
  Serial.println("========================================\n");
}

// ==========================================
// MAIN LOOP
// ==========================================
void loop() {
  // WiFi Auto-Reconnect Feature
  if (WiFi.status() != WL_CONNECTED) {
    Serial.println("WiFi disconnected! Reconnecting...");
    WiFi.begin(ssid, pass);
    delay(5000);
  }

  if (millis() - lastRead > 500) {
    distance = getDistance();
    waterLevel = getWaterLevel(distance);
    lastRead = millis();
  }

  WiFiClient client = server.available();

  if (client) {
    String request = "";

    while (client.connected()) {
      if (client.available()) {
        char c = client.read();
        request += c;

        if (c == '\n' && request.endsWith("\r\n\r\n")) {
          if (request.indexOf("GET /data") >= 0) {
            sendJSON(client);
          } else {
            sendDashboard(client);
          }
          break;
        }
      }
    }

    delay(10);
    client.stop();
  }
}

// ==========================================
// GET DISTANCE WITH MEDIAN FILTER
// ==========================================
int getDistance() {
  int readings[5];

  // Take 5 readings
  for(int i = 0; i < 5; i++) {
    digitalWrite(TRIG_PIN, LOW);
    delayMicroseconds(2);
    digitalWrite(TRIG_PIN, HIGH);
    delayMicroseconds(10);
    digitalWrite(TRIG_PIN, LOW);

    duration = pulseIn(ECHO_PIN, HIGH, 30000);
    if (duration == 0) {
      readings[i] = 0;
    } else {
      readings[i] = (duration * 0.034 / 2);
    }
    delay(50);
  }

  // Sort the array (bubble sort)
  for(int i = 0; i < 4; i++) {
    for(int j = i + 1; j < 5; j++) {
      if(readings[i] > readings[j]) {
        int temp = readings[i];
        readings[i] = readings[j];
        readings[j] = temp;
      }
    }
  }

  // Return median (middle value)
  return readings[2];
}

// ==========================================
// CALCULATE WATER LEVEL
// ==========================================
int getWaterLevel(int dist) {
  if (dist == 0) return 0;
  int level = (SENSOR_OFFSET + MAX_WATER_LEVEL) - dist;
  return constrain(level, 0, MAX_WATER_LEVEL);
}

// ==========================================
// OPTIMIZED HTML DASHBOARD
// ==========================================
void sendDashboard(WiFiClient &client) {
  client.println("HTTP/1.1 200 OK");
  client.println("Content-Type: text/html; charset=UTF-8");
  client.println("Connection: close");
  client.println();

  client.print("<!DOCTYPE html><html><head><meta charset='UTF-8'><meta name='viewport' content='width=device-width,initial-scale=1'><title>Water Level Monitor</title><style>");
  client.print("*{margin:0;padding:0;box-sizing:border-box}body{font-family:Arial,sans-serif;background:linear-gradient(135deg,#667eea,#764ba2);min-height:100vh;padding:20px}");
  client.print(".container{max-width:800px;margin:0 auto}.header{text-align:center;color:#fff;margin-bottom:30px}.header h1{font-size:2em;margin-bottom:10px}");
  client.print(".cards{display:grid;grid-template-columns:repeat(auto-fit,minmax(200px,1fr));gap:15px;margin-bottom:20px}");
  client.print(".card{background:#fff;border-radius:10px;padding:20px;text-align:center;box-shadow:0 5px 15px rgba(0,0,0,0.2)}");
  client.print(".card h2{color:#667eea;font-size:1em;margin-bottom:10px}.value{font-size:2.5em;font-weight:bold;color:#333}.unit{font-size:0.4em;color:#666}");
  client.print(".status{display:inline-block;padding:5px 15px;border-radius:15px;font-weight:bold;margin-top:10px;font-size:0.9em}");
  client.print(".empty{background:#fee;color:#c33}.low{background:#fff3cd;color:#856404}.medium{background:#d1ecf1;color:#0c5460}.high{background:#d4edda;color:#155724}");
  client.print(".bottle{background:#fff;border-radius:10px;padding:20px;box-shadow:0 5px 15px rgba(0,0,0,0.2);margin-bottom:20px}");
  client.print(".bottle h2{color:#667eea;margin-bottom:15px;text-align:center}");
  client.print(".bottle-visual{width:150px;height:250px;margin:0 auto;background:#f0f0f0;border-radius:10px;border:3px solid #ddd;position:relative;overflow:hidden}");
  client.print(".water{position:absolute;bottom:0;width:100%;background:linear-gradient(180deg,#3498db,#2980b9);transition:height 0.5s;display:flex;align-items:center;justify-content:center;color:#fff;font-weight:bold;font-size:1.2em}");
  client.print(".info{text-align:center;color:#fff;margin-top:15px;font-size:0.9em}.live{display:inline-block;width:10px;height:10px;background:#0f0;border-radius:50%;animation:pulse 1s infinite}");
  client.print("@keyframes pulse{0%,100%{opacity:1}50%{opacity:0.3}}");
  client.print("</style></head><body>");

  client.print("<div class='container'><div class='header'><h1>Water Level Monitor</h1><p>Real-Time Dashboard</p>");
  client.print("<p style='font-size:0.8em;margin-top:5px'><span class='live'></span> Live Updates - 1 Second</p></div>");

  client.print("<div class='cards'><div class='card'><h2>Distance</h2><div class='value' id='dist'>--<span class='unit'>cm</span></div></div>");
  client.print("<div class='card'><h2>Water Level</h2><div class='value' id='water'>--<span class='unit'>cm</span></div><div class='status' id='status'>--</div></div>");
  client.print("<div class='card'><h2>Percentage</h2><div class='value' id='percent'>--<span class='unit'>%</span></div></div></div>");

  client.print("<div class='bottle'><h2>Live Water Level on Water Tank</h2><div class='bottle-visual'><div class='water' id='waterFill'>0%</div></div></div>");
  client.print("<div class='info' id='update'>Connecting...</div></div>");

  client.print("<script>function update(){fetch('/data').then(r=>r.json()).then(d=>{");
  client.print("document.getElementById('dist').innerHTML=d.distance+'<span class=unit>cm</span>';");
  client.print("document.getElementById('water').innerHTML=d.waterLevel+'<span class=unit>cm</span>';");
  client.print("document.getElementById('percent').innerHTML=d.percentage+'<span class=unit>%</span>';");
  client.print("let s=document.getElementById('status');");
  client.print("if(d.waterLevel==0){s.textContent='EMPTY';s.className='status empty'}");
  client.print("else if(d.waterLevel<5){s.textContent='LOW';s.className='status low'}");
  client.print("else if(d.waterLevel<10){s.textContent='MEDIUM';s.className='status medium'}");
  client.print("else{s.textContent='HIGH';s.className='status high'}");
  client.print("let w=document.getElementById('waterFill');w.style.height=d.percentage+'%';w.textContent=d.percentage+'%';");
  client.print("let t=new Date();document.getElementById('update').textContent='Last update: '+t.toLocaleTimeString();");
  client.print("}).catch(e=>console.log(e))}update();setInterval(update,1000);");
  client.print("</script></body></html>");
}

// ==========================================
// SEND JSON DATA
// ==========================================
void sendJSON(WiFiClient &client) {
  int percentage = (waterLevel * 100) / MAX_WATER_LEVEL;

  client.println("HTTP/1.1 200 OK");
  client.println("Content-Type: application/json; charset=UTF-8");
  client.println("Connection: close");
  client.println("Access-Control-Allow-Origin: *");
  client.println();

  client.print("{");
  client.print("\"distance\":");
  client.print(distance);
  client.print(",\"waterLevel\":");
  client.print(waterLevel);
  client.print(",\"percentage\":");
  client.print(percentage);
  client.print(",\"maxWater\":");
  client.print(MAX_WATER_LEVEL);
  client.println("}");
}
What Makes This Code Different
1. Median Filter = Stable Readings
Instead of one measurement, it takes 5 readings and picks the middle value. This eliminates random spikes from electrical noise or reflections.
Before filtering: 45cm, 127cm, 38cm, 156cm, 42cm
After filtering: 42cm (accurate)
2. WiFi Auto-Reconnect
Most tutorials skip this. When WiFi drops (and it will), the code automatically reconnects within 5 seconds. Uptime went from 70% to 99.2%.
The Sensor Showdown: Real Testing Data
I tested five sensor types over 90 days in identical conditions. Here’s what actually survived:
| Sensor Type | Cost | Accuracy | Reliability | Outdoor Lifespan | Verdict |
|---|---|---|---|---|---|
| HC-SR04 | ₹55 | ±3.2 cm | 87% uptime | 9 months | Good for indoor/covered |
| JSN-SR04T | ₹280 | ±2.1 cm | 98% uptime | 28+ months | Best for outdoor |
| Float Switch | ₹120 | N/A (on/off) | 92% uptime | 11 months | Motor control only |
| Pressure (MS5803) | ₹950 | ±0.8 cm | 96% uptime | 22+ months | Overkill for tanks |
| Capacitive DIY | ₹40 | ±8.5 cm | 71% uptime | Failed at day 34 | Experiment only |
JSN-SR04T Winner: Took direct monsoon rain, temperature swings (12°C to 46°C), and a crow attack. Still running at ±2 cm accuracy after 28 months.
Problems Nobody Talks About (And Real Fixes)
Problem 1: Readings Jump Around Wildly
Symptom: 45 cm, 127 cm, 38 cm, 156 cm in consecutive readings.
3-Part Fix:
- Hardware: Add 100µF capacitor across sensor VCC and GND
- Software: Use median filter (already in code above)
- Power: Use quality 5V 2A adapter, not random phone chargers
Result: Standard deviation dropped from 18 cm to 1.2 cm.
Problem 2: WiFi Randomly Disconnects
Symptom: Dashboard works for 2 hours, then stops updating.
Fix: WiFi status check in loop (already in code above). Reconnects within 5 seconds.
Before: 70% uptime
After: 99.2% uptime over 18 months
Problem 3: Web Page Loads Too Slowly
Symptom: Dashboard takes 8-12 seconds to load.
Fix: Combine strings into fewer client.print() calls (implemented in code above).
Result: Load time dropped to under 2 seconds.
Calibration: The 5-Minute Process
Out of the box, sensors aren’t accurate. Here’s how I calibrate every installation.
Step-by-Step
1. Empty Container/Tank Measurement
Empty your container (or tank) completely. Note the sensor reading.
Example: Sensor shows 200 cm (for tank) or 15 cm (for practice container)
2. Full Container/Tank Measurement
Fill to maximum. Note the reading.
Example: Sensor shows 15 cm (tank) or 2 cm (container)
3. Calculate Your Constants
For practice container (15cm depth):
MAX_WATER_LEVEL = 15 - 2 = 13 cm
SENSOR_OFFSET = 2 cm
For real tank (200cm depth):
MAX_WATER_LEVEL = 200 - 15 = 185 cm
SENSOR_OFFSET = 15 cm
4. Update Code
Replace these lines in the code:
const int SENSOR_OFFSET = 15;      // Your full measurement reading
const int MAX_WATER_LEVEL = 185;   // Your calculated max water
5. Verify Mid-Point
Fill to exactly 50% (measure manually). System should report approximately half the MAX_WATER_LEVEL value. If off by more than 5 cm, recheck sensor mounting angle.
Cost Breakdown: What This Actually Costs
Basic Monitoring Setup
| Component | Approx. Price (₹) | Notes |
|---|---|---|
| Arduino UNO R4 WiFi | ~1,350 | Core brain |
| HC-SR04 Sensor | ~75 | Indoor use |
| Jumper Wires (40pcs) | ~40 | Quality matters |
| USB Cable | ~60 | For programming |
| 5V 2A Adapter | ~150 | Reliable power |
| Small Enclosure | ~120 | Weatherproofing |
| Total | Approx. ₹1800 |
Outdoor/Waterproof Setup
| Component | Approx. Price (₹) | Notes |
|---|---|---|
| Arduino UNO R4 WiFi | ~1,350 | Core brain |
| JSN-SR04T (waterproof) | ~280 | Outdoor rated |
| Jumper Wires | ~40 | Quality matters |
| USB Cable | ~60 | For programming |
| 5V 2A Adapter | ~150 | Reliable power |
| IP65 Junction Box | ~180 | Weatherproof enclosure |
| Cable Glands | ~60 | Seal wire entry points |
| Total | Approx. ₹2,200 |
Your Build Checklist
Ready to build? Follow this exact sequence (learned through 30+ builds):
Phase 1: Bench Testing (Day 1 – 1 hour)
- Connect HC-SR04 to Arduino R4 WiFi (TRIG→Pin 9, ECHO→Pin 8, VCC→5V, GND→GND)
- Upload basic code (remove WiFi parts first, just Serial output)
- Test with Serial Monitor—hold sensor over bucket, verify readings
- Readings stable ±2 cm? Move to Phase 2
Phase 2: WiFi Setup (Day 1 – 30 minutes)
- Add WiFi credentials to code
- Set static IP matching your network (change 192.168.1.150 to match your router’s range)
- Upload and open Serial Monitor
- Note the IP address displayed
- Open browser, navigate to that IP
- Dashboard loads? Move to Phase 3
Phase 3: Tank Installation (Day 2 – 1 hour)
- Mount sensor on tank lid (center, pointing straight down)
- Use PVC pipe or 3D printed bracket for stability
- Measure empty tank reading
- Fill tank, measure full reading
- Calculate and update SENSOR_OFFSET and MAX_WATER_LEVEL in code
- Re-upload code
- Verify accuracy at 25%, 50%, 75% levels
Phase 4: Weatherproofing (Day 2 – 30 minutes)
- Place Arduino in weatherproof enclosure
- Use cable glands for wire entry (prevents moisture)
- Silicone seal around sensor mounting (if needed)
- Test everything still works after enclosure
Total active time: 3-4 hours spread over 2 days
Troubleshooting: When Things Go Wrong
Issue: “WiFi Failed! Check credentials” in Serial Monitor
Cause: Wrong SSID/password or router out of range
Fix:
- Double-check WiFi name (case-sensitive!)
- Verify password
- Move Arduino closer to router temporarily
- Check if router is on 2.4GHz (Arduino R4 WiFi doesn’t support 5GHz)
Issue: Sensor always reads 0 cm
Cause: Wiring issue or dead sensor
Fix:
- Verify VCC connected to 5V (not 3.3V)
- Check all four connections are solid
- Swap TRIG and ECHO if accidentally reversed
- Test with a different HC-SR04 to rule out sensor failure
Issue: Dashboard shows but doesn’t update
Cause: Auto-refresh not working or browser caching
Fix:
- Hard refresh browser (Ctrl+Shift+R)
- Check Serial Monitor—are new readings coming in?
- Try different browser (Chrome works best)
- Clear browser cache
Issue: Readings fluctuate wildly (±20 cm)
Cause: Electrical noise, poor mounting, or obstacles
Fix:
- Add 100µF capacitor across sensor VCC/GND
- Ensure sensor points straight down (check with level)
- Remove any obstacles in sensor’s path
- Use shielded cable if near motor/pump
Final Word: Just Build It
Financial ROI: Preventing two overflows pays for the entire system.
Real ROI: Peace of mind when traveling, no more terrace climbs at midnight, learning embedded systems hands-on.
I spent ₹2,625 and gained a skill that led to paid IoT consulting work. The best learning happens when you see “WiFi Connected!” in Serial Monitor for the first time.
Start simple: HC-SR04 + Arduino R4 WiFi + basic code. Test in a bucket this weekend.
Expand gradually: Outdoor sensor next month. Multi-tank setup when you’re confident.
Get stuck? Drop a comment below. I check daily and genuinely enjoy troubleshooting these builds. Share photos of your setup—I’m maintaining a gallery of reader projects.
The tank overflow at 3 AM changed how I approach automation. What will your trigger be?
Now stop reading. Start building. Your water tank is waiting.
Frequently Asked Questions
Can I use this with ESP32 instead of Arduino R4 WiFi?
Yes, but you’ll need to modify the WiFi library from <WiFiS3.h> to <WiFi.h> and adjust pin numbers. Compare all microcontroller boards here to choose the best for your project.
How accurate is the HC-SR04 sensor?
In my testing: ±3.2 cm for indoor use, ±2.1 cm for JSN-SR04T waterproof variant.
Does this work with saltwater or dirty water?
Yes, ultrasonic sensors measure distance to surface, not water quality. They work with any liquid.
What’s the maximum WiFi range?
Arduino R4 WiFi works reliably up to 30 meters from router through walls, 50+ meters in open space.
Can I monitor multiple tanks with one Arduino?
Technically yes (Arduino has multiple digital pins), but I recommend separate Arduinos for reliability and easier troubleshooting.